“The more that you read, the more things you will know. The more that you learn, the more places you’ll go.”
Dr. Seuss
Here is the audio version of this post. Thank you so much for listening.
One of the most common questions I get asked about Instagram is about how to share your beautiful images to your Facebook biz page. The question came up again on a recent webinar along with a request for a step by step. So a BIG shout out to Brenda and Dawnette for inspiring this post.
Here we go….
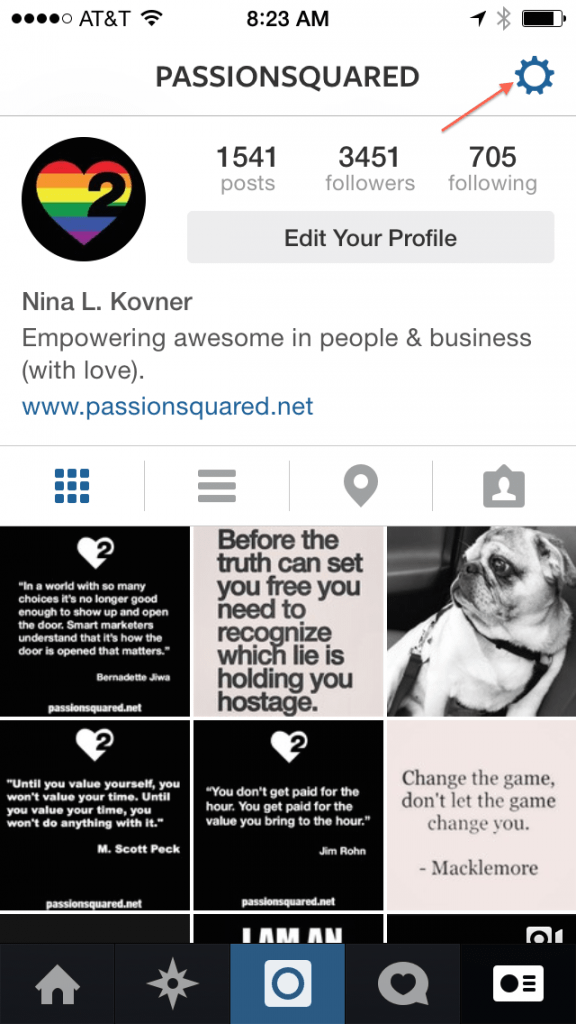
Step One
Log in to Instagram, go to your profile page and click on the little wheel thing in the upper right hand side of the page.
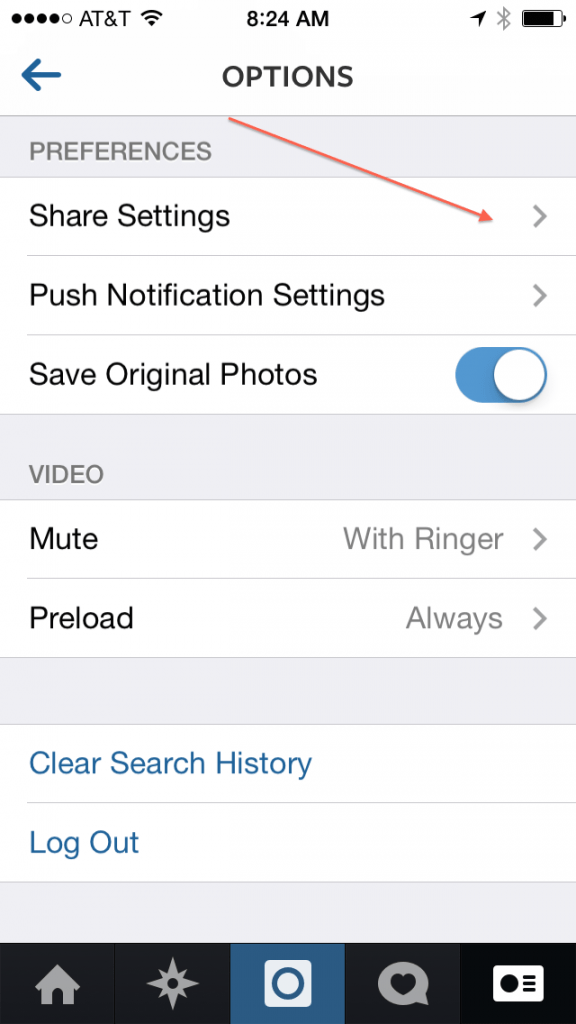
Step Two
Click on Share Settings
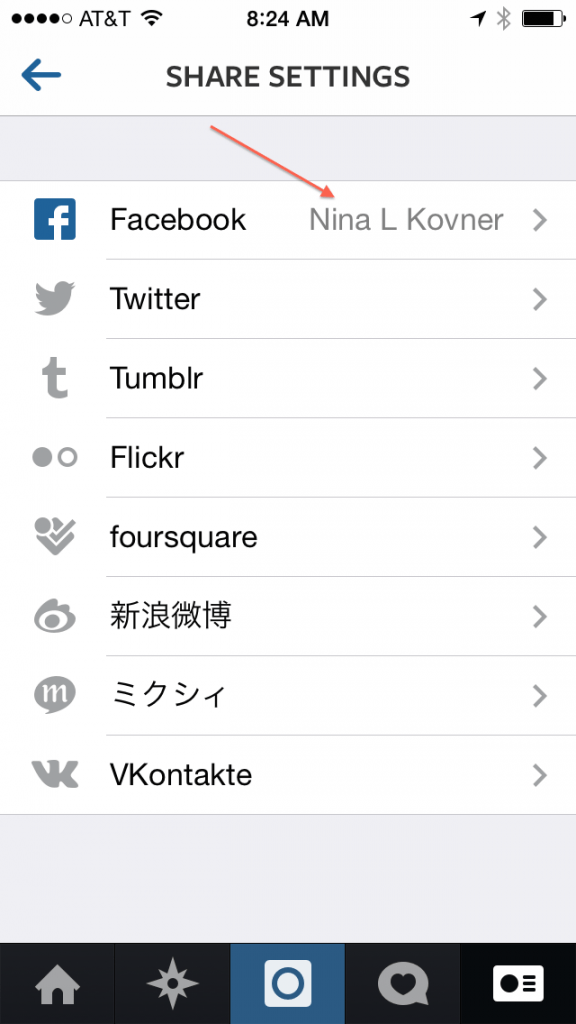
Step Three
Click on your name. It should show the name of your Personal Page that is connected to your Business Page. If you have not yet connected your Instagram to your Facebook personal page, it will ask you if you want to connect, etc. Do that. Then click on your name.
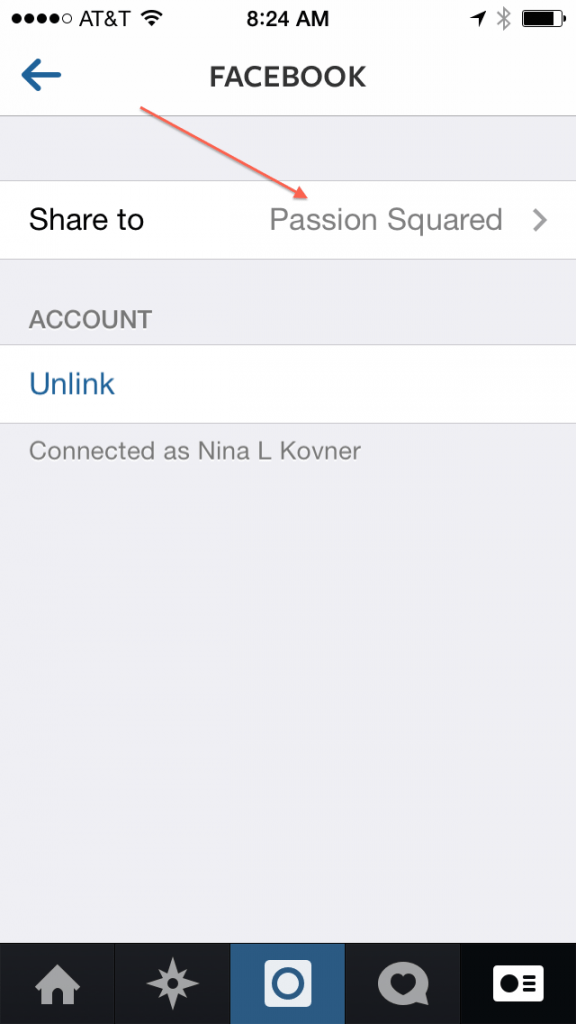
Step Four
If you manage one business page, that page name will appear and you simply select that page. If you manage more than one business page, select the business you want to SHARE your Instagrams to. Step Five
Start sharing your awesomeness!
Thank you again to Brenda and Dawnette for inspiring this post. Are you sharing your awesomeness on Instagram? Let’s connect! You can follow me @passionsquared
“The artist lives to have stories to tell and to learn to tell them well.”
Criss Jami
One thing we can always count on in the social + digital world is change. For those of you who are addicted to Pinterest and are using it for your business, you will be happy to know that Pinterest just launched Business Pages.Here is a super easy step-by-step for you.
Step One
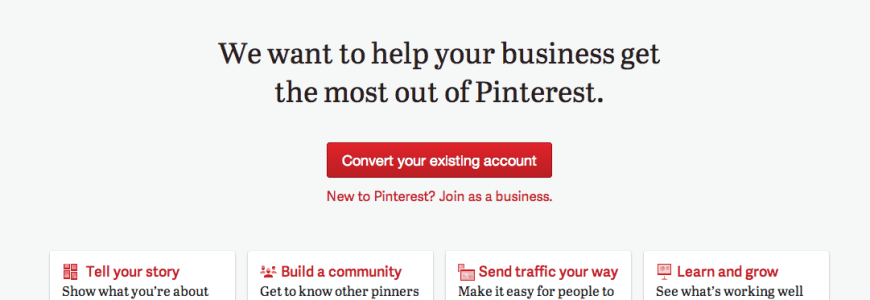
Go to business.pinterest.com. If you want to change your existing page, select “Convert Existing Account”. If you want to start a new business page, select “Join As A Business”.
Step Two
Fill in all of your business information. If you are converting an account, it will look different. We will get to that in the next step.
Step Three
If you are converting an existing account, this is what it will look like. First, you select your business type, for salons, choose local business. For session stylists, beauty bloggers, etc choose professional. You now have an opportunity to edit your profile, change your business name, About section, user name etc. HINT: User names are your unique URL, so we suggest if possible, it be the exact name of your business. This helps with becoming more discoverable on the web, big time!
Step Four
We now have the opportunity to “verify” our websites. This allows for your actual website URL to be featured on your page. HINT: We highly recommend you have a super smart person do this, or what some people call the “IT” guy or girl. For those of us with WordPress blog sites, there is a way to verify, but again, its takes a IT person. We have our IT friends doing ours this week.
Step Five
While you have your super smart IT guy or girl, have them add the “widgets” you want to your website. Pinterest has added some cool new ones. All of these widgets are designed to increase engagement and connections. Super cool.
Step Six
Celebrate and keep pinning your passions! And be sure to thank your super smart IT friend for the help.
If you want to learn more about Pinterest, check out our webinar posted on PassionSquaredTV.
We also offer one-on-one mentoring in the world of social, digital, marketing and branding. If that sounds like your thing, click here to connect with us.
“The beginning of knowledge is the discovery of something we do not understand.”
Frank Herbert
In the world of social + digital, one super important thing to remember is search + discovery. This is when people looking for your salon can easily DISCOVER you on the web. A big part of search + discovery on the web is the URL (uniform resource locator) or your personalized web address.
With social platforms, we have an opportunity to choose our username, if it’s not already taken. We highly recommend for branding, marketing and easy discovery, that you stick with the name of your brand (salon, company, product). By doing this, you can add your Facebook Page username to your marketing materials, business cards, etc.
Here is a simple step-by-step on how to claim your personalized Facebook username (URL).
Claimed Username URL (this is what we want it to look like)
1. Go into your Admin Panel on Facebook, Click on Edit Page then Click on Update Info.
2. You will now be in the Basic Information Section, and will see Username. Click on Change Username.
3.Now you can type in your desired Page username. We recommend you try first for the name of your actual Facebook Page. Click on Check Availability. If your first choice is not available, you can try to add another word that still connects with your Facebook page name.
Example: Your Page name is Passion Squared. You type that in and see that it is taken. So try Passion Squared Salon, or Passion Squared Hair Salon, etc. (NOTE: Once you claim a username for your page, you can ONLY change it one more time)
4. Time to celebrate. You did it!
To learn more about how to expand your social beauty intelligence and craft the ultimate social + digital plan to better engage and build word of mouth and referrals, click here. We would love to hear from you.
(shared with LOVE from your passionistas Nina + Gordon)