
“Any fool can know. The point is to understand.”
Albert Einstein
We were working with a client the other day and were talking about planning and had a big AHA! We realized that many people with Facebook Business Pages do not know about the super handy feature called Scheduled Posts.
We firmly, 1000% believe that the social web is about real time engagement, two-way communication and building relationships, which means being very active on your pages. However, we see this as a great tool for when you want to take a vacation, have an exact plan of your posts for the week, or know that you will be out all night on New Years Eve and want to sleep in.
What it is NOT is a way to remove yourself from making authentic daily connections with your community such as posting shout outs to clients and team members, posting awesome pics from the day in the salon, commenting on posts from others on your page, responding to inbox messages, etc.
Here is how it woks. It’s super easy.
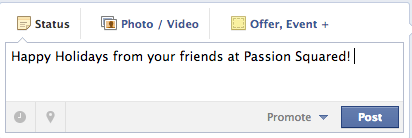
Step One
Create your post just like you always do.

Step Two
Click on the little clock on the left hand side of the Status Box.


Step Three
Select the Year, Month, Day and Time you want the Post to go LIVE.


Step Four
Click on Schedule. When you do, this little box will pop up to show you your Post is scheduled and where to find it if you want to edit or delete it.


